Last update: 07-03-2025
In Acrelia you can create and configure an automated welcome message so that your contacts receive a fully customisable email when they subscribe to your newsletter.
In this article:
1. Creating and setting up the event
1.1 Creating the event
1.2 Retry policy
2. Creating the message
3. Scheduling the sending
3.1 Sending time
3.2 Sending options
3.3 Activating the event
4. How to view scheduled messages
5. Understanding statistics
6. How to send a welcome email to imported contacts
7. How to send a welcome email to manyally added contacts
The first step for your new subscribers to start receiving a welcome message once they sign up to your newsletter is to create the event and set it up.
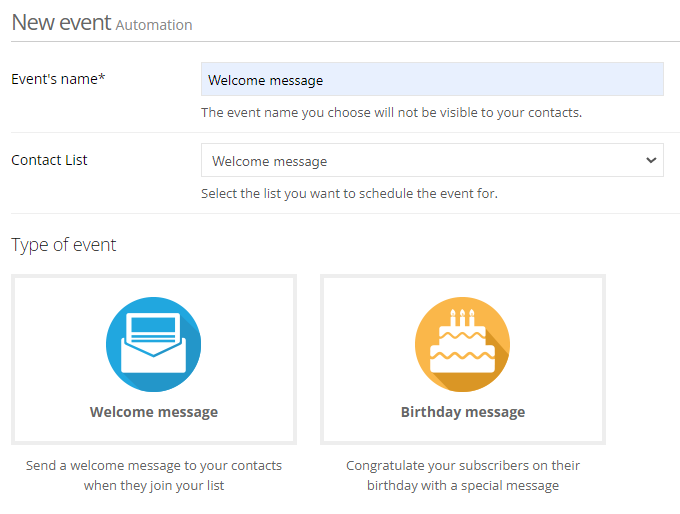
To create the event, go to the menu item "Automation" - "Events" and click on "New". Enter a name for the event, select the list for which you want to schedule it and finally, choose the type of event you want to create: "Welcome message" or "Birthday messag2. In this case, select the first option: "Welcome message".
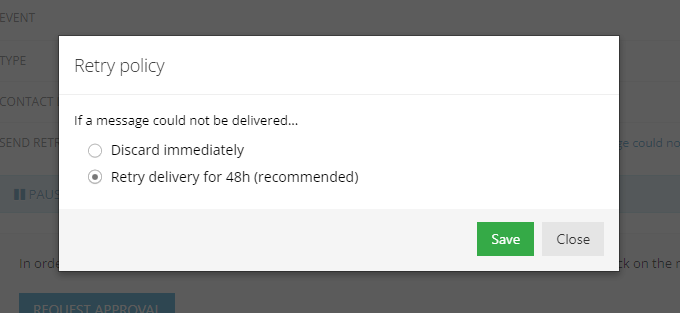
Next, you need to configure the retry policy: Click on the edit button in the "Send tries" section and choose whether you want a message that could not be delivered to be immediately discarded, i.e., not reattempted, or whether you want delivery to be reattempted for 48 hours.
Now it's time to create the message that will be sent automatically once you set up and activate the event. You can create your message from "Automation" - "Messages" by clicking on "New".
Once you have created the message, go back to the event, go to the "Message" section and click on the "Select message" box. In the drop-down menu, you can select the message you have previously created. From here, you can also create a new message by clicking on the "Create new" button or edit the message by clicking on the "Edit" button.
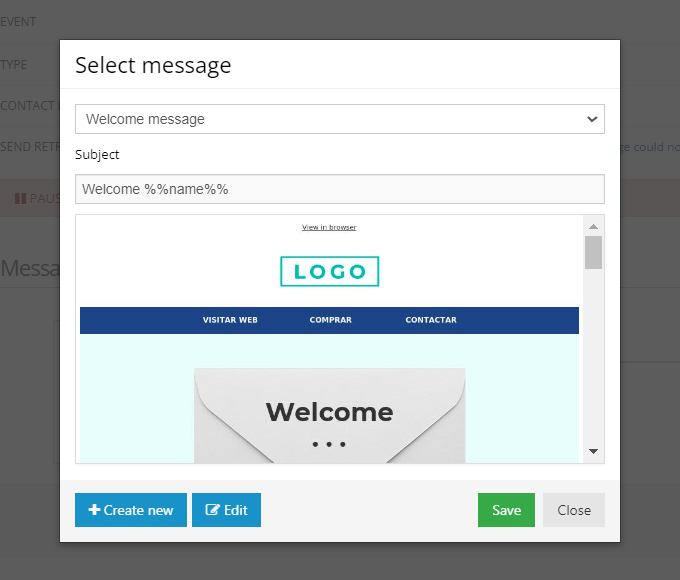
Bear in mind that when you want to modify the message, you have to pause the event. While the event is active, it is not possible to edit it. You will find explained below how to activate, pause and resume the event.
Once the message has been created, we can configure and schedule the sending. To do this, follow the steps below:
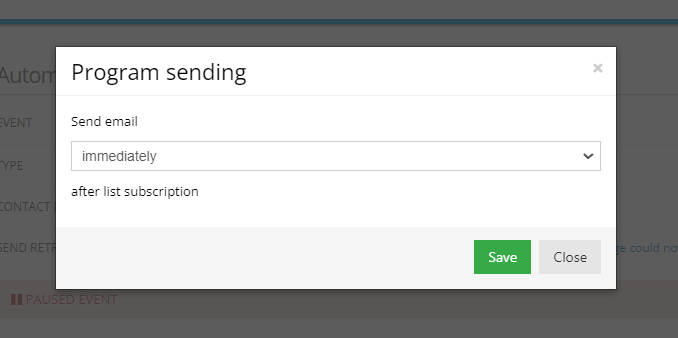
First of all, think about how much time should take place between the moment the registration of new contacts is complete through the filling of a form and the moment they receive the welcome message (it can be immediately or it take the minutes, hours, days or weeks you consider). You can configure this from the “Send” section:
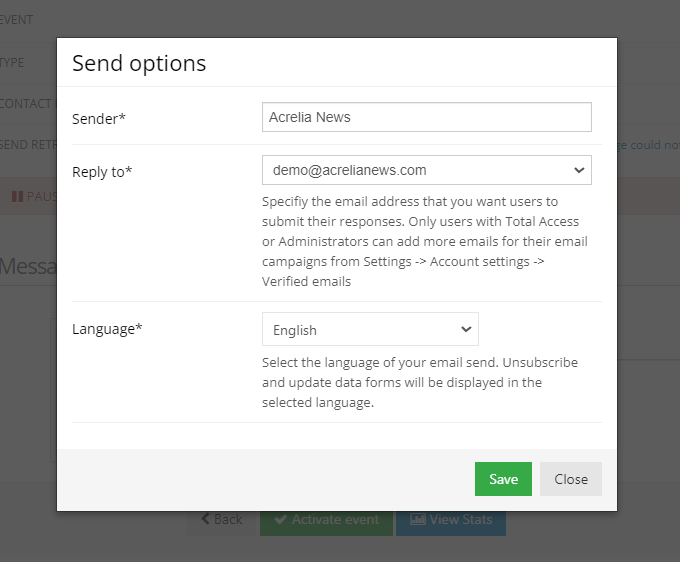
Then, just below you can configure the sender, the email address to which your subscribers can reply and the language of the unsubscribe, update data and view in browser links.
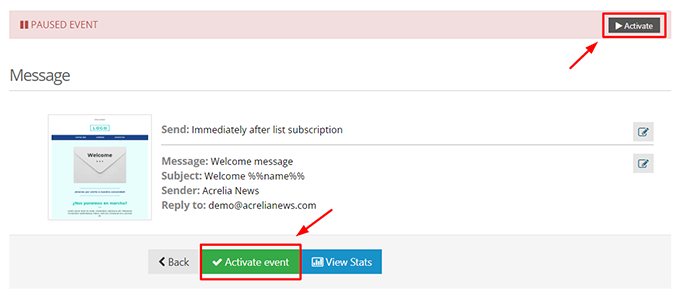
To start delivering the welcome message to your contacts, click on "Activate event".
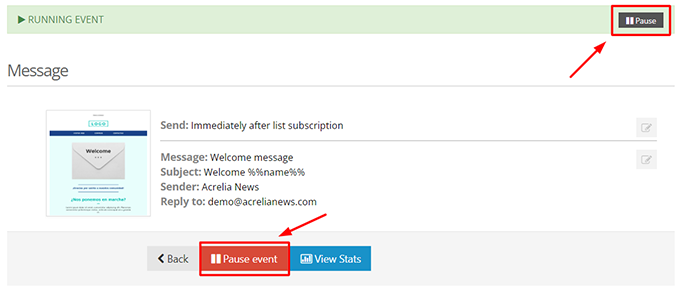
You can pause the event at any time. To do this, click on the "Pause event" button. It is important to know that to make changes to an event, you will have to pause it first, as it is not possible to modify it while it is active.
It is also possible to pause the event without accessing it. In "Automation" - "Events", you can see all the events you have created and activate or pause them from there.
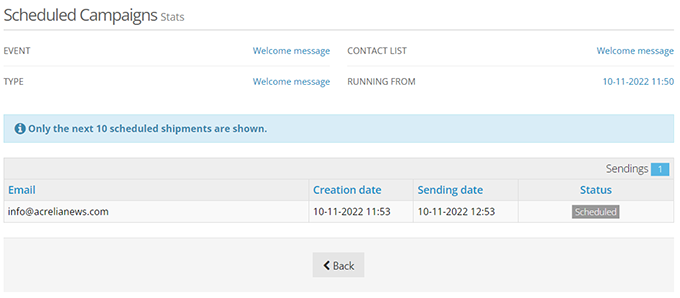
To see the scheduled messages, that is, those that will be sent during the next hours and days, you just have to access the event, click on the "View stats" button and in the "View scheduled sends" section you will see the number of messages that are in queue.
If you want to see the details of these, click on the box above. You will be able to see the email address, the creation date and the sending date of the next 10 scheduled mailings.
It is essential to understand the information provided by the statistics in order to establish the necessary corrective measures to improve the delivery, open and click rates of your automations.
You can view the statistics of your welcome event by going to "Automation" - "Events" and clicking on "Stats". You can also access them from inside the event at the bottom, by clicking on the "View stats" button. At the top, you will be able to see the mailings that have already been sent, the mailings that could not be sent and the mailings that are scheduled to be sent in the near future.
Here you can learn more about the statistics to better understand them and extract useful information from them.
When you import contacts to Acrelia ("Contacts" - "Import contacts"), if your list is associated with a welcome event, you must indicate whether you want to send a welcome message or not to the new contacts. In other words, you must indicate whether you want to include new subscribers in the welcome event you have active:

If you indicate "No", the welcome message will not be automatically sent to new contacts. If you select "Yes", once the import is done, the welcome message will be automatically scheduled to be sent to your new subscribers.
When you manually add a contact to a list that is linked to an automated welcome event, you must indicate whether or not you want to send a welcome message to the new subscriber. In other words, you must indicate whether you want to include the new contact in the welcome event you have active:

If you indicate "No", the welcome message will not be sent automatically to the new contact. If you indicate "Yes", once the new contact has been saved, the welcome message will be automatically scheduled to be sent.
You can also automate the sending of birthday greetings to your contacts.
Book a free demo
Our experts will advise you on the best Email Marketing solution for your business.