Last update: 06-03-2025
Do you want to have your contacts' information as updated as possible? Do you need, for example, to better segment your mailings, to ask your subscribers their preferences, sending language or city where they live?
In the footer of all your Acrelia campaigns, in addition to the unsubscribe link, there is a link to update your data. However, if you want that link to be more visible because you are interested in your contacts to update or add information of your interest, we show you how to incorporate a custom link in your campaign so that your subscribers can update/add their data and preferences.
Before starting the campaign, it is important to be clear about the information you want to obtain or update from your contacts, as you will have to create (if you don't already have one) a custom field or those you consider to obtain or update the data.
Once created, don't forget to add the field(s) to your contact list (you will have to edit the list and access the "Extra Fields" tab to move the field(s) from "Available fields" to "Selected fields").
When you have finished this step, you will be able to view the update form, if you wish, going to "Resources - Forms" and clicking the "Update" tab. If you want to customise the form with your corporate colours, copies and logos, we explain you how to do it.
For example, in our case, we want our contacts to inform us of their interests. To do this, we have created a drop-down field with options called "Interests". The update form would look like this:
First of all, think carefully about the strategy you will follow. For example, if you will make a specific campaign for this or if you will include a section in your regular newsletters with this option. In addition, you will have to think about the text and call to action to encourage your subscribers to perform the desired action.
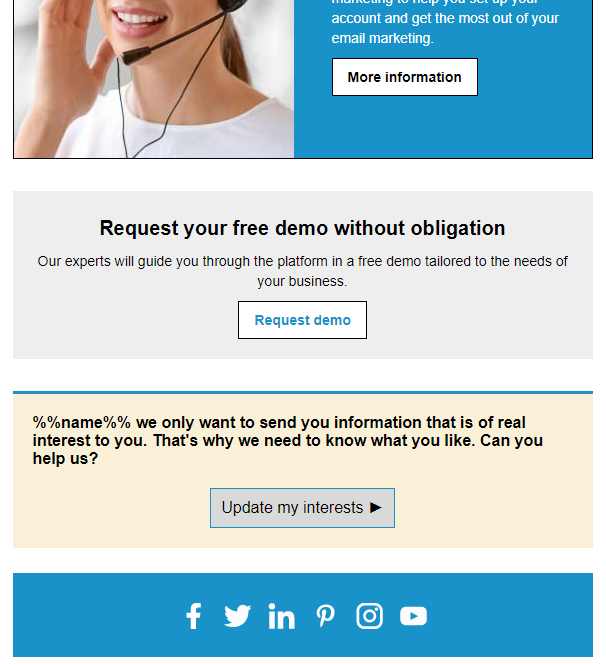
In the final part of the following example campaign, we have added a section for our contacts to update their interests:

The last step is to create the link to the form.
To do this, in the text editor, select the word or words you want to link to and click on the "link" button:

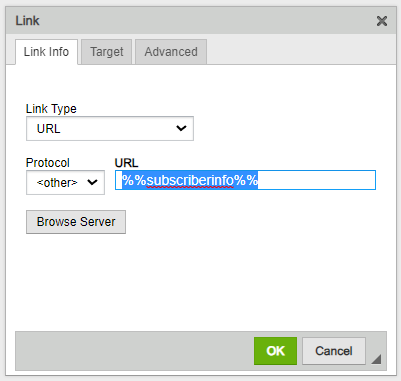
Then, you will need to configure the link as follows:

Remember that links generated from tags, as is the case, are not active in the tests. Therefore, if you want to confirm that you have done it correctly, we recommend you to create an internal list with your email address and send the campaign to it.
Book a free demo
Our experts will advise you on the best Email Marketing solution for your business.